This post contains affiliate links. I may earn a commission if you shop through them, at no cost to you.
Microneedling, in my opinion, is the MVP of anti-aging. The results take time, but once I started noticing changes in my skin, I understood the hype. Let me tell you why 👇
How does microneedling work?
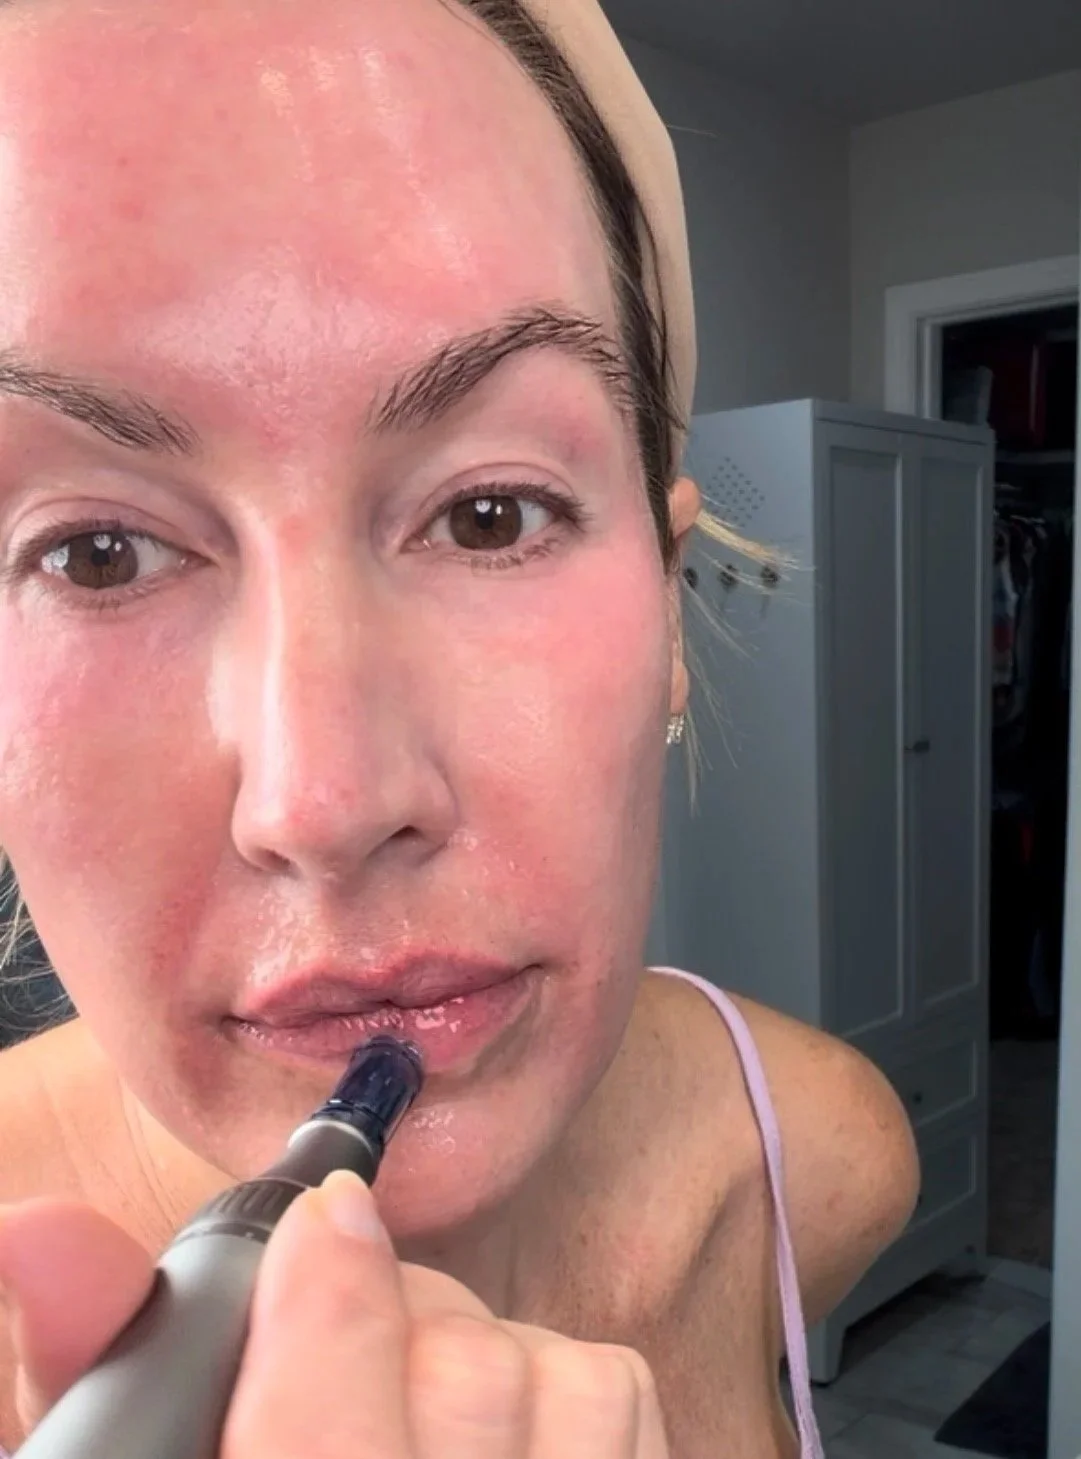
Microneedling uses tiny needles to create controlled micro-injuries in the skin, triggering its natural repair process and supporting collagen production.
It can help improve the appearance of fine lines, wrinkles, acne scars, dark spots, and uneven skin texture. It can also help improve skin firmness.
With a microneedling pen, the depth can be adjusted depending on the area being treated. Deeper doesn’t automatically mean better.
Why I’m obsessed with microneedling for anti-aging and boosting collagen production
Yes, building collagen and improving fine lines are definitely part of the appeal, but the changes in my skin texture and overall glow are what really made me fall in love with microneedling.
Honestly, the older I get, the more I love my skin. I think it looks better now than it did at 25.
And around here, I microneedle more than just my face. I treat my neck, chest, stomach, knees, thighs, arms, and scars too. Clearly, my face wasn’t the only thing that needed tightening around here!
Why I share everything I know about microneedling at-home
Professional microneedling treatments can be expensive, and the cost is why I decided to learn to do it at home.
As an RN, I know people are going to try microneedling at home. That’s why I share my experience. I want people to understand what they’re doing and take safety seriously.
Proper hygiene, a fresh sterile needle cartridge for every session, and aftercare matter, even when you’re treating your own skin in your home.
Are you considering microneedling at home and wondering where to start?
My microneedling guide combines written explanations with videos for the face, neck, and chest. From preparation and supplies to precautions and aftercare, I’ve brought the information I share together in one place so you can learn at your own pace.
And remember: results from microneedling take time.
Collagen doesn’t build overnight, and improvements can continue developing over several months. Give your skin time to heal between treatments and be patient with the process.
For me, the changes in texture and glow have been worth the wait. ✨
Get My Microneedling Guide For Beginners
I created this guide to take the confusion out of at-home microneedling. It walks you through everything you need to know for your first session, including the products I use, how I prepare, my step-by-step routine, and aftercare.
Ready to microneedle at home?
I created this guide to take the confusion out of at-home microneedling. We'll walk through everything I wish someone had handed me before my first session, including the products I use, how I prepare, my step-by-step routine, and aftercare.
What You'll Get
A full breakdown of what microneedling actually is, and how it supports collagen and elastin production
A depth guide by treatment area (forehead, cheeks, eye area, neck, chest, and more), plus my personal depth limits
A complete safety section, including who shouldn't microneedle and special guidance if you're prone to melasma
A pretreatment checklist (what to pause, and when, before your session)
My full supply list, with direct links to everything I use
A cartridge and needle-depth guide, plus numbing cream safety information
Step-by-step workspace setup, sanitation, and skin prep
My complete face, neck, and chest routine
Day-by-day aftercare, from treatment night through day seven
A full breakdown of what's normal to expect during the healing week
This is a digital guide delivered immediately after purchase. No physical products are included. This guide is intended for educational purposes only and is not medical advice; always follow proper sterile technique and consult a healthcare provider with any safety concerns specific to you.
Educational Disclaimer
I am a registered nurse, but I am not acting as your healthcare provider. This guide shares my personal at-home microneedling routine for general educational and informational purposes only. It is not individualized medical advice and does not establish a nurse-patient or other professional relationship.
Affiliate Disclosure
This guide contains affiliate links and discount codes. If you make a purchase through one of my links or use one of my codes, I may earn a commission at no additional cost to you.

Educational Disclaimer: I'm a registered nurse, but I'm not acting as your healthcare provider here. This is my personal at-home routine, shared for general educational purposes only. It isn't individualized medical advice, and it doesn't create a nurse-patient relationship. Always do your own research and talk to a provider before starting any new treatment.
Affiliate Disclaimer: Some of the links on this page are affiliate links. If you make a purchase through one of them, or use one of my codes, I may earn a small commission at no extra cost to you. I only share brands and products I've researched and use myself.